How to Declutter Kids' Artwork (Without the Guilt)
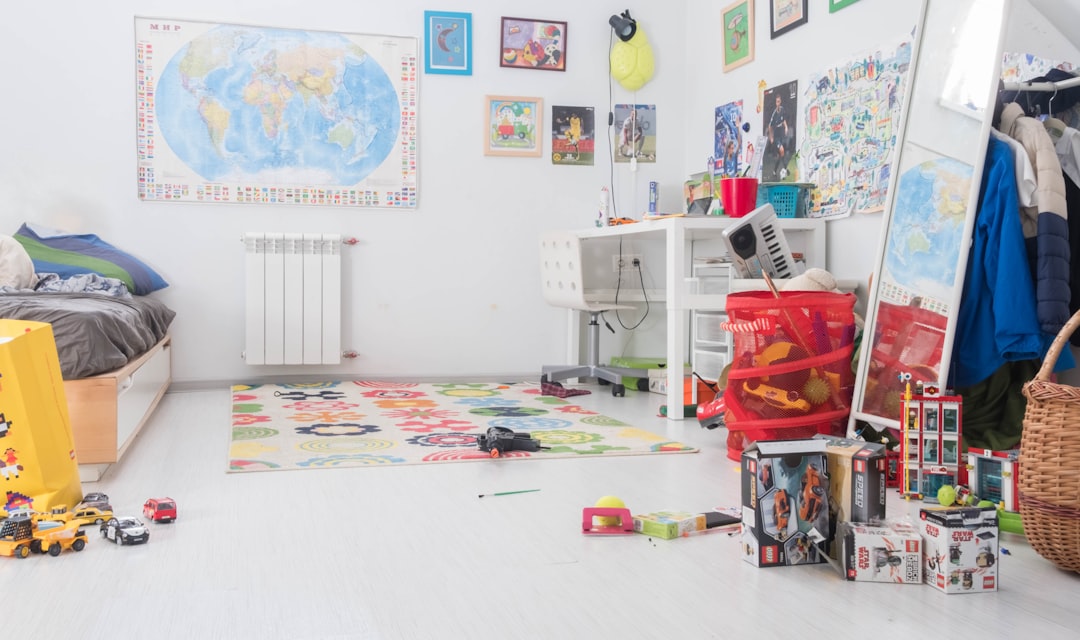
In my daughter’s first 3 years of preschool, she created roughly 600 pieces of art. Daily paintings, weekly crafts, monthly group projects. I kept everything for the first year. By year three, our office floor had stacks of finger paintings and macaroni sculptures we could not walk around.
The guilt was real. Each piece felt sacred. But the volume had stopped honoring her work; it had buried it. Here is the system that finally let me preserve the meaningful pieces without keeping every paper.
Why Kids Artwork Feels So Hard to Release
Kids’ artwork triggers parental guilt unlike any other clutter category:
- The child made it with their hands
- It captures a specific developmental moment
- They might ask about it later
- Throwing it feels like rejecting the child
- The art represents time and effort
- Future-you might want to show grandchildren
These feelings are real. They are also based on the assumption that physical objects are the only way to preserve memories.
According to a study from the Journal of Family Psychology, 78% of parents save more children’s artwork than they will ever display, organize, or share. The volume becomes its own form of forgetting; everything matters means nothing stands out.
What Is the Best Way to Declutter Kids’ Artwork?
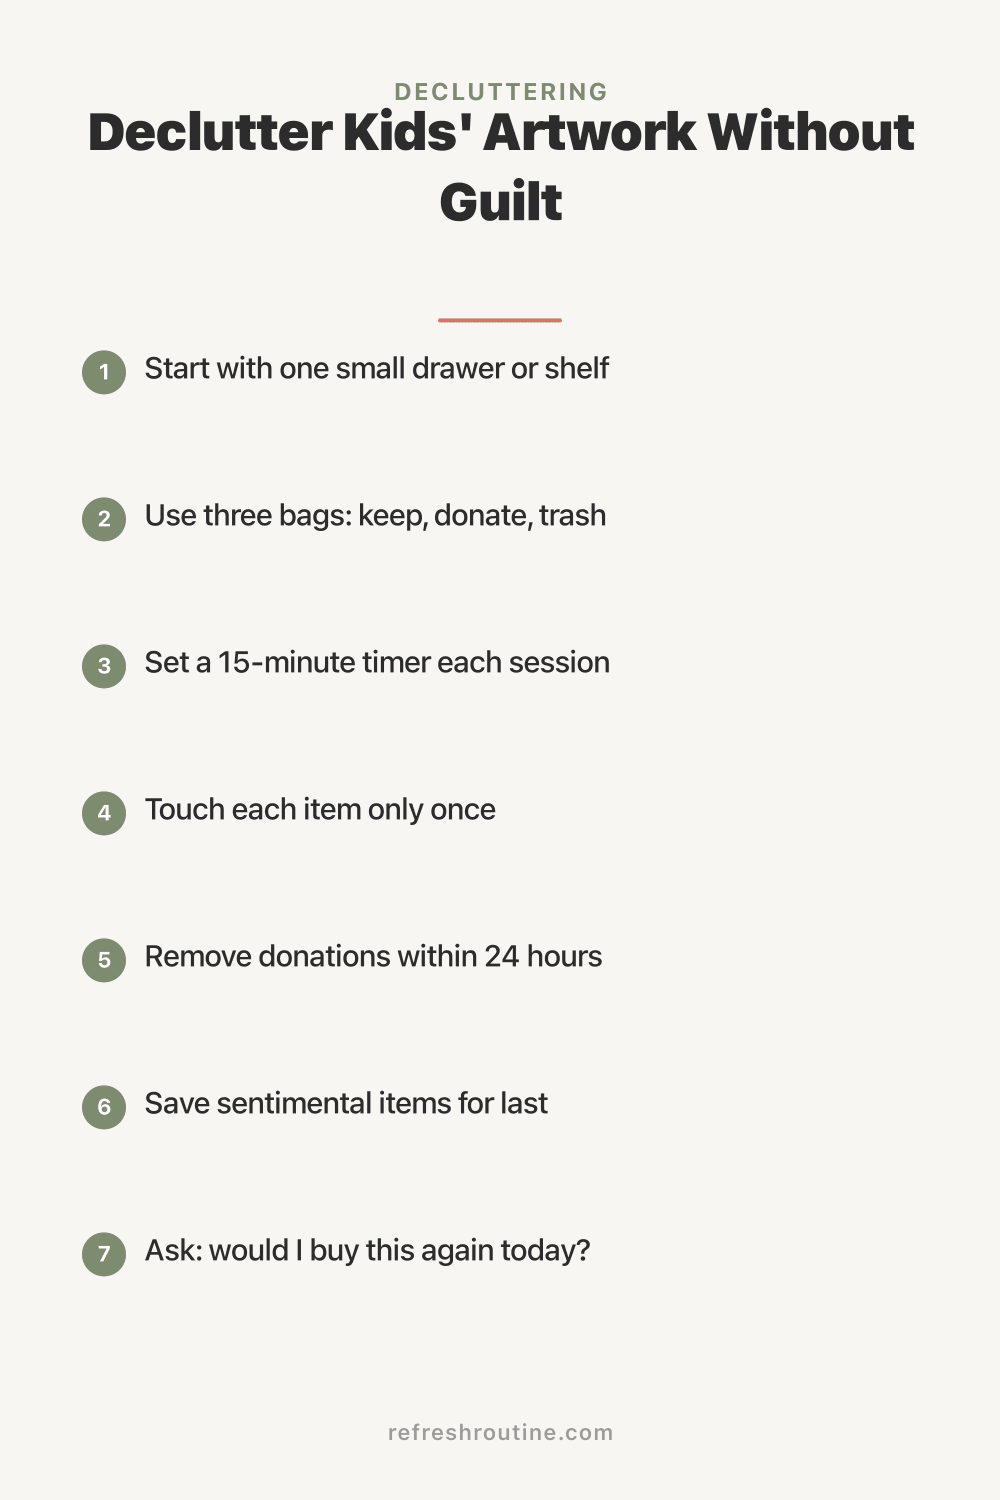
The best way to declutter kids’ artwork is to photograph everything first, then choose 1 to 3 truly special pieces per child per year for physical archive. Recycle or repurpose the rest. The photos preserve the volume; the physical archive preserves the cream. Most families keep 95% less artwork after using this system and feel relieved, not regretful.
The Kids’ Art Decluttering System
Step 1: Set Up the Photo Habit
Before anything else, install a photo-capture habit. Use your phone or a dedicated photo book app. Every piece of art gets photographed within 7 days of arrival:
- Phone photo: Quick, easy, automatic backup
- Artkive or similar app: Photo plus auto-archive into a book
- Google Photos shared album: Photo backup with family access
- Dropbox folder: Simple cloud backup
The photo step is the unlock. Once everything is digitally captured, releasing the physical becomes much easier.
Step 2: Create a Display Rotation
Designate a small area for current art:
- One wall section with picture rails
- A bulletin board in the kitchen
- A magnetic strip in the hallway
- A clothesline with clips between two hooks
Hang only 5 to 8 pieces at a time. Rotate every 2 to 4 weeks. The art stays visible without taking over walls.
Step 3: The Weekly Triage
Each Sunday evening (5 to 10 minutes):
- Gather all new art from the week
- Photograph any not yet captured
- Display 1 to 2 new favorites (rotate older display out)
- Place undisplayed pieces in a “to decide” bin
- After 30 days in the bin, items are released unless specifically chosen for archive
This rolling system keeps current art visible while preventing accumulation.
Step 4: The Annual Archive
At the end of each school year (or in December for a calendar year):
- Pull out the year’s “to decide” bin
- With your child (if old enough), choose 1 to 3 special pieces
- Add to that year’s archive folder
- Photograph all kept pieces
- Recycle or repurpose the rest
The archive grows by 1 to 3 pieces per kid per year. Manageable forever.
What I Wish I Knew About Kids’ Art
After 8 years of refining this system, here is what helped most.
Involve kids in the choice. Asking my daughter which 3 paintings she loves most made her feel valued, not deprived. Her selections often surprised me.
Photos do not replace the original. A photo is a record, not the same as the physical piece. Be intentional about which originals stay.
The “best” piece is rarely the prettiest. The painting where she first wrote her name. The chalk drawing she was so proud of. The handprint from kindergarten. The meaningful piece is the one with the story, not the most artistic.
Some art deserves to be functional. I have one painting framed in our hallway. One on a mug for grandma’s gift. One scanned and printed on a tote bag. Functional pieces honor the art more than archived ones.
Letting go gets easier. The first 50 pieces hurt. By piece 500, it was a habit. The skill builds with practice.
How Do You Choose Which Art to Keep?
Choose art to keep using three criteria: developmental milestones (first painting, first letter, first portrait), strong emotional response from the child or you, and unique artistic moments (unusual technique, surprising creativity, themes that matter). Pieces that meet two or three criteria deserve archiving. The rest get photographed and released. Most parents find 1 to 3 pieces per child per year that meet this bar naturally.
Creative Ways to Use Kids’ Art
Beyond simple storage, consider:
Photo Books
Use Artkive, Plum Print, or a simple Shutterfly book to compile the year’s photographed art. The book becomes the archive, allowing physical pieces to be released. Most cost $20 to $60 per year per child.
Functional Items
Companies print kids’ art on:
- Mugs (gift for grandparents)
- Tote bags
- Pillows
- T-shirts
- Phone cases
- Calendars (12 monthly favorites)
These extend the life of meaningful art without storage burden.
Gallery Walls
Frame and rotate 1 to 3 special pieces per child as part of home decor. Real frames, prominent placement. The art becomes intentional decor rather than fridge clutter.
Holiday Cards and Gifts
Use kids’ artwork as:
- Holiday card design
- Wrapping paper
- Gift tags
- Thank-you cards
The art finds a temporary purpose, not just storage.
Annual Time Capsule
One small box per year contains the chosen pieces. Open at college graduation, wedding, or first child of their own. The intentional reveal honors the keeping.
Managing School and Group Project Pieces
Some categories deserve special handling:
Large Group Projects
Class projects, paper mache, life-size cutouts. These rarely fit in any storage system.
- Photograph in detail
- Display for 1 to 2 weeks
- Recycle (call it “the project graduates”)
Sentimental Items From Teachers
Class books, group photos, special projects:
- These often have multiple students’ work
- Keep if your child is featured prominently
- Photograph and donate to the school’s archive otherwise
3D Projects
Sculptures, dioramas, models:
- Display in a designated area for 30 days
- Photograph from multiple angles
- Disassemble and recycle materials
- Keep one or two truly exceptional pieces per year
Class Books
The bound book your child contributed to:
- Keep if your child’s pages are significant
- Photograph the relevant pages otherwise
- Pass to younger sibling if applicable
For more sentimental decluttering strategies, see our sentimental items guide.
When Kids Get Upset
Some kids care deeply about every piece. Strategies:
Photo first, decide later: All photographed pieces feel preserved Give them ownership: They choose what stays in archive Set physical limits: “We have room for 3 pieces in your box this year. Which 3?” Designate keeping: A small special box that travels with them as they grow Frame the conversation: “Some art is beautiful for the moment. Some art is forever. You get to choose which is which.”
Most children adapt within 2 to 3 cycles of the system. The conversation gets easier each year.
Managing Across Multiple Children
For families with multiple kids:
Separate everything: Each child has their own bin, archive, and display section Equal storage allotment: Same number of kept pieces per child per year Joint family pieces: Group artwork or sibling collaboration goes in a family archive Photo backup is universal: Same photo system works for all kids
Avoid letting one child’s art dominate. Equal storage prevents perceived favoritism.
Display Rotation Tips
Keep the current display interesting:
Rotate every 2 to 4 weeks: Prevents the “I stopped seeing it” effect Theme rotations: All recent paintings, all 3D works, all family portraits Seasonal displays: Winter art in December, spring art in April Special events: Display birthday paintings on birthdays
The display becomes a living gallery rather than a static fridge collection.
What to Do With Unwanted Pieces
After photo-capture and selection, pieces get released. Options:
Recycle: Most paper artwork is recyclable Repurpose for next project: Cut up into a collage with your child Donate to libraries: Some libraries accept art for craft programs Send to grandparents: One piece per visit, signed by the child Special goodbye: For sentimental kids, ceremonial release (compost, repurpose, send to specific person)
The release feels less like rejection when it has a clear destination.
Maintaining the System Long-Term
After initial setup, maintenance takes 10 minutes per week:
Weekly: Photograph new pieces, rotate display Monthly: Review “to decide” bin, release older items Annually: Create the year’s archive, choose final keepers Periodically: Update photo book or digital archive
The system runs itself with light maintenance. Most families spend 30 minutes per month total.
For more decluttering systems, see our decluttering mistakes guide.
Key Takeaway
Decluttering kids’ artwork is grief work disguised as logistics. The fix is to use photos as the volume archive while keeping only 1 to 3 special pieces per child per year as physical archive. Photograph everything, display 5 to 8 pieces at a time on rotation, triage weekly, and archive annually. Involve children in selecting the keepers. Most families end up keeping 5% of artwork while feeling they preserved more than before, because the chosen pieces are intentional rather than buried in volume. The physical art tells a curated story. The photos tell the whole story. Both are valid. Both can coexist without overflowing your closets.
For more, see our sentimental items guide and decluttering kids’ toys.

Frequently Asked Questions
How much of your kids art should you keep?
Keep 1 to 3 truly special pieces per child per school year, plus 5 to 10 favorites from each developmental stage. The rest gets photographed and recycled. Most parents keep too much; the meaningful pieces get lost in the volume.
What is the best way to store kids artwork?
Store kept artwork in one flat archive box per child per year (or per stage), labeled clearly with date and age. Use acid-free folders for paintings. Take photos of everything for digital backup. The physical archive stays slim; digital captures the volume.
How do you display kids artwork without clutter?
Display kids artwork on a rotation gallery wall (5 to 8 pieces at a time), digital photo frame (cycles through hundreds), or art display rail with clips. Change displays every 2 to 4 weeks. The art stays visible without permanent wall clutter.