Drying Rack Ideas for Small Apartments and Big Families
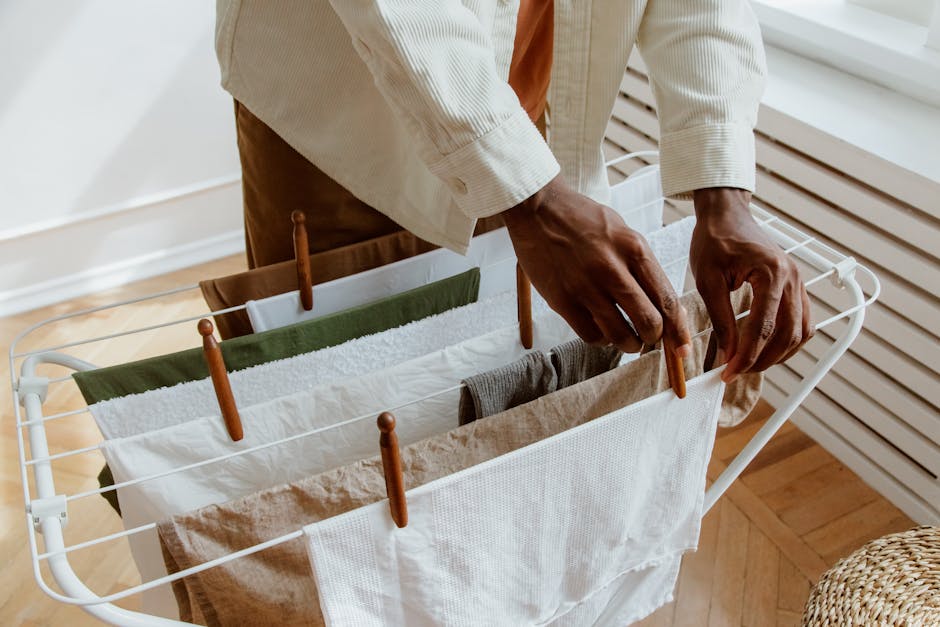
When our dryer broke last winter, I bought a cheap folding rack and figured I would replace the dryer in a month. Eight months later, I still air-dry most of our clothes. The clothes last longer, look better, and our utility bill dropped $40 a month.
Air drying is one of those changes that surprised me with how much it improved daily life. Here are the 10 drying rack ideas that work, from $20 folding racks to elaborate ceiling systems.
Why Air Drying Matters
Most clothing benefits from air drying:
- Longer garment life: Dryer heat is the #1 cause of clothing wear
- No shrinkage: Hot dryers shrink cotton, wool, and others
- No pilling: Tumbling causes fabric pilling
- Lower energy bills: $100 to $300 annual savings
- Better for environment: 60+ pounds of CO2 saved per load
- Wrinkle reduction: Hung clothing dries flat
According to a study from Project Drawdown, air drying reduces household carbon emissions by 7% on average. The cost savings and clothing longevity are bonuses on top.
What Is the Best Air Drying Setup?
The best air drying setup combines a primary drying location (rack, line, or wall-mounted system providing 15 to 25 feet of line space) with secondary spot drying for specific items (sweaters laying flat, delicates separately). The system should match your space (apartment vs house), family size, and how often you do laundry. Setup costs $20 to $200 depending on solution.
10 Drying Rack Ideas
1. Wall-Mounted Retractable Line (Best Space-Saving)
A retractable line installed on a laundry room wall. Pulls out for use, retracts when done.
Cost: $30 to $60 Line length: 20 to 50 feet Best for: Permanent installation, owners
2. Ceiling Pulley System (Best for Tall Ceilings)
A traditional clothes rack that raises to the ceiling using pulleys. Common in old farmhouses.
Cost: $80 to $200 Best for: Tall ceilings, traditional homes Installation: 2 hours, hit ceiling joists
3. Folding Floor Rack (Best Budget)
A simple X-shaped or accordion folding rack. Sets up in seconds.
Cost: $20 to $50 Line length: 30 to 40 feet Best for: Renters, small apartments
4. Over-the-Door Drying Rack
Hangs on a door using brackets. Out of the way when not in use.
Cost: $20 to $35 Best for: Small apartments, doors with hooks Line length: 5 to 15 feet
5. Heated Drying Rack
Electric drying rack that warms up slightly to dry clothes faster.
Cost: $50 to $150 Best for: Cold climates, faster air drying Line length: 15 to 25 feet
6. Bathroom Wall-Mount
A wall-mounted rack specifically designed for bathrooms (humid environment-resistant).
Cost: $25 to $50 Best for: Apartments, separate laundry from bathroom
7. Tabletop Sweater Drying Rack
Mesh rack that sits flat. For drying sweaters, knits, and delicates without stretching.
Cost: $10 to $25 Best for: Sweater lovers, delicate item drying
8. Backyard Clothes Line
Traditional outdoor line. Best drying speed in good weather.
Cost: $20 to $50 for hardware Best for: Owners with outdoor space, good weather
9. Multi-Level Tower Rack
A vertical rack with multiple drying levels. Maximum line in minimal floor footprint.
Cost: $40 to $80 Best for: Small spaces with adequate ceiling height
10. Combination System
Most homes benefit from multiple options:
- Primary rack for everyday loads
- Wall-mount for specific items
- Flat surface for sweaters
Cost: $50 to $150 for combined setup Best for: Most families
What I Wish I Knew About Air Drying
After 8 months of air drying most of our laundry, here is what helped.
Spin cycle is non-negotiable. Run a high-spin cycle on the washer to remove maximum water. Cuts drying time by 2 to 3x.
Indoor airflow matters more than heat. A fan or open window dries faster than just temperature alone.
Heavy items take 24+ hours. Towels, jeans, sweaters need patience. Plan accordingly.
Hang clothes inside-out. Reduces color fading and preserves printed designs.
Don’t bunch. Each item needs airflow between others. Spacing matters.
Setting Up Air Drying
Step 1: Audit Current Laundry
How much laundry do you do per week?
Small household (1-2 people): 2 to 3 loads weekly Medium household (3-4 people): 5 to 7 loads weekly Large household (5+ people): 10+ loads weekly
This determines space needs.
Step 2: Identify Drying Space
Consider:
- Dedicated laundry room
- Spare bathroom or guest bathroom
- Closet space
- Apartment balcony
- Backyard
- Spare room (winter use)
Step 3: Choose System Based on Space
Match space to system type. A small apartment closet might use over-the-door racks; a basement laundry room might use a full ceiling pulley system.
Step 4: Install or Set Up
Wall-mounted systems: Hire help or use anchors Folding racks: No installation Ceiling pulleys: Pro installation recommended
Step 5: Establish Routine
Sunday night: Hang the week’s whites Monday morning: Take down whites, replace with darks Weekly rhythm prevents pile-ups.
How Do You Air Dry Clothes Without Them Smelling?
Air dry clothes without smell by ensuring full water removal (high-spin cycle), maintaining airflow (fan, AC, open window), allowing 4 to 8 hours minimum (most clothes), and using laundry odor-eliminating products if humidity is high. The “wet smell” comes from items drying too slowly. Fast airflow eliminates the issue.
Specific Item Drying
Towels
Take 12 to 24 hours typically. Hang separately for airflow. Stiff after air-drying is normal; soften with vinegar in wash.
Jeans and Denim
24 to 48 hours. Inside-out hanging preserves color. Lay heavy seam-side up.
Sweaters
Lay flat on a mesh sweater rack to prevent stretching. 12 to 24 hours.
Knits
Same as sweaters. Reshape while wet. Lay flat.
Delicates
Hang on padded hangers or mesh rack. Specific drying line in shade.
Cotton T-Shirts
4 to 8 hours. Hang from bottom hem (top stretches over time).
Synthetic Activewear
2 to 4 hours. Fast-drying due to fabric.
Heavy Coats
24 to 48 hours. Hang in well-ventilated space. Allow shape to retain.
For more on laundry care, see our laundry symbols guide.
Climate Considerations
Humid Climate
- Use dehumidifier in drying space
- Choose well-ventilated areas
- Allow longer drying time
- Heated rack helps significantly
Dry Climate
- Drying is fast (4 to 8 hours for most)
- Inside drying works great
- Easy to maintain
Cold Climate
- Indoor drying with heat
- Window placement for sun exposure
- Heated rack is most useful
Tropical Climate
- Outdoor drying when not raining
- Avoid late-day moisture
- Watch for fading
Apartment Setups
Small Apartment
- Over-the-door rack
- Bathroom wall mount
- Tabletop sweater rack
- Foldable floor rack for big loads
Total space: Use existing doors and bathroom
Standard Apartment
- Dedicated drying space in laundry closet
- Wall-mounted rack
- Specialty sweater rack
- Limited outdoor balcony use
Renter-Friendly Setups
Use removable solutions:
- Tension rods between cabinets
- 3M Command hook lines
- Free-standing folding racks
- Door-mounted brackets
For more apartment ideas, see our small home office guide (similar small-space principles apply).
Hard Water Considerations
In hard water areas, air drying can leave stiff clothes:
Solution: Add 1/2 cup white vinegar to rinse cycle Result: Softer fabric, no detergent buildup Cost: Pennies per load Benefit: Replaces fabric softener
Saving Money With Air Drying
Calculations for typical family of 4:
Dryer use: 5 loads weekly = 260 loads annually Average cost per dryer load: $0.45 to $1.10 (electricity) Annual dryer cost: $120 to $290
Air drying: $0 Equipment cost: $50 to $150 one-time Annual savings: $100 to $250
Plus clothing savings: Clothes lasting 50 to 100% longer means buying less
Total: $200 to $500 annual savings just from air drying.
Common Air Drying Mistakes
After helping family members switch:
Mistake 1: Skipping the spin cycle. Wet clothes take 2x as long.
Mistake 2: Bunching items together. No airflow = slow drying.
Mistake 3: Hanging in damp basement. Mildew risk.
Mistake 4: No ventilation. Open window or fan necessary.
Mistake 5: Not allowing enough time. 24 hours for heavy items.
For more laundry strategies, see our laundry sorting systems and laundry mistakes guides.
When to Use the Dryer
Air drying works for most items. Use the dryer for:
- Towels (when in a hurry)
- Sheets (faster than air drying)
- Items that wrinkle dramatically (need tumble drying for softness)
- Allergy season (sun-dried outdoor clothes may carry pollen)
Most other items benefit from air drying. The dryer is optional, not required.
Key Takeaway
Air drying saves money ($100 to $300 annually), extends garment life (50 to 100% longer), and reduces environmental impact significantly. The setup costs $20 to $200 depending on system choice: wall-mounted retractable lines for owners with dedicated space, folding floor racks for renters, ceiling pulley systems for traditional homes, and combination systems for most families. Aim for 15 to 25 feet of line space for an average family load. Set up with a high-spin cycle in the washer, adequate airflow, and proper spacing. Most clothes dry in 4 to 8 hours; heavy items in 24+ hours. Start with one folding rack this weekend and add to the system as you learn what works for your space.
For more laundry care, see our laundry symbols guide and save money on laundry guides.

Frequently Asked Questions
What is the best indoor drying rack?
The best indoor drying rack depends on your space: wall-mounted retractable racks for small apartments, ceiling-mounted pulley racks for high ceilings, freestanding folding racks for renters, and full clothing line systems for laundry rooms. Aim for at least 15 to 25 feet of line space for an average family load.
Why air dry clothes instead of using a dryer?
Air drying clothes extends garment lifespan by 50 to 100% (high dryer heat is the biggest source of clothing wear), reduces energy costs ($100 to $300 annually depending on usage), eliminates shrinking, prevents pilling, and is the recommended care for most fabrics. The trade-off is time (4 to 24 hours vs 30 to 60 minutes).
How do you air dry clothes faster?
Air dry clothes faster by using a high-spin cycle on the washer (removes more water), spacing items with airflow between, running a fan or air conditioner, using a heated drying rack (specialty product), or hanging in a warm sunny location. Most clothing dries in 4 to 8 hours indoors with good airflow.