Laundry Sorting Systems That Save Time
For years, my laundry routine started with dumping a massive pile of mixed clothes on the floor and sorting through it piece by piece. Darks here, lights there, delicates somewhere else, towels in another pile. This sorting ritual took 15 to 20 minutes before I even started a single load. With a family of four generating about 8 to 10 loads per week, that sorting time added up fast.
Then I set up a laundry sorting system that eliminates the sorting step almost entirely. Clothes go into the right bin when they’re taken off, and on laundry day, each bin becomes a ready-to-wash load. It sounds simple because it is, but the time savings are real. Here’s exactly how to set up a system that works for your family.
According to the Bureau of Labor Statistics, the average American spends about 17 minutes per day on laundry-related tasks. A good sorting system shaves 10 to 15 minutes off each laundry session by removing the pre-wash sorting step.
The Pre-Sort Method: How It Works
The core idea behind a laundry sorting system is this: sort clothes when they’re generated, not when they’re washed. Instead of one hamper that collects everything, you use two or three bins where family members toss clothes into the correct category as they undress.
The basic setup:
- Two to three labeled bins placed where dirty clothes are generated (bedroom, bathroom, closet)
- Each bin represents one wash load category (darks, lights, delicates/special care)
- When a bin is full, it’s ready to wash. No sorting needed.
I placed a three-bin sorter in our master closet and a two-bin setup in the kids’ bathroom. It took about a week for everyone to learn the system, and now sorting happens automatically.
How Many Categories Should I Sort Laundry Into?
Two to three categories is optimal for most families. The essential sort is darks and lights. Adding a third category for delicates, hand-wash, or towels improves fabric care without overcomplicating the process. Studies by textile researchers at North Carolina State University’s College of Textiles show that proper sorting extends garment life by 20% to 30% because fabrics receive appropriate temperature and agitation settings. Beyond three categories, the time savings diminish and the system becomes harder for family members to follow.
I started with four categories and quickly dropped back to three. The fourth bin (for “special care” items) rarely filled up, and family members kept putting normal clothes in it by mistake.
Comparing Laundry Sorting Systems
Here are the main types of sorting systems I’ve tested, with honest pros and cons.
Option 1: Multi-Bin Hamper (My Top Pick)
A standalone hamper with two or three removable fabric bags, each in a different section.
- Cost: $25 to $60
- Space needed: About 2x2 feet of floor space
- Best for: Families of 2 to 4, bedrooms or closets with floor space
- Pros: Bags lift out and carry directly to the washer. Labels make sorting intuitive.
- Cons: Takes up floor space. Some cheaper models tip over when one section gets full.
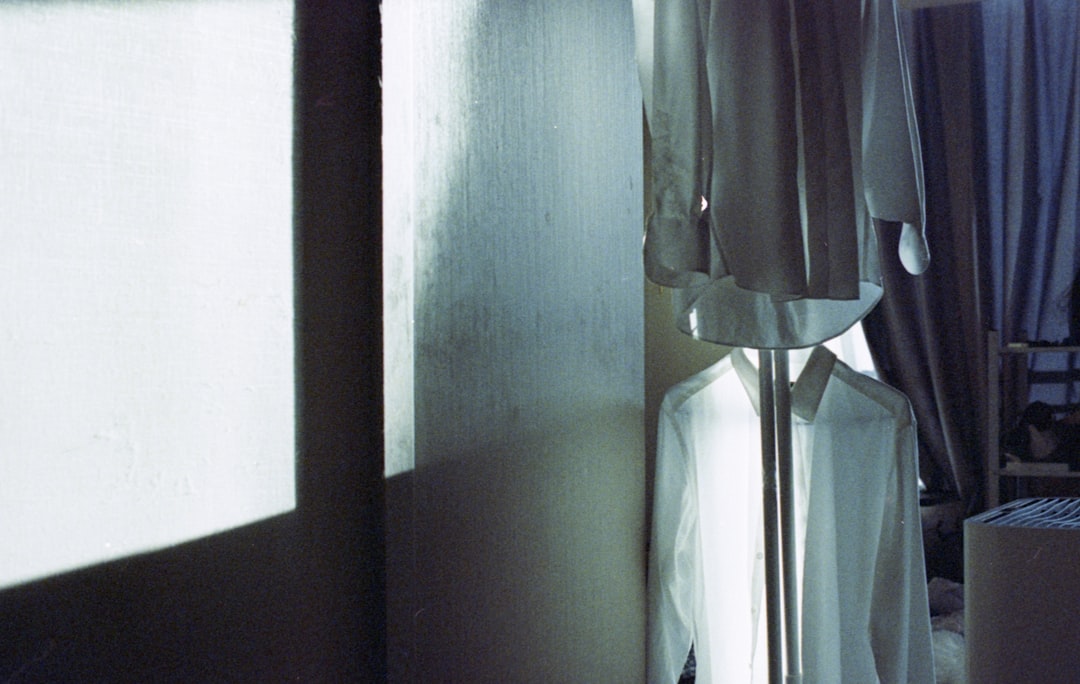
This is what I use in our master closet. The three sections are labeled “Darks,” “Lights,” and “Delicates.” When a bag is full, I lift it out and carry it straight to the washing machine. No sorting, no floor piles, no extra steps.
Option 2: Wall-Mounted Sorting Bags
Fabric bags attached to wall hooks or a mounted rail.
- Cost: $15 to $35
- Space needed: About 3 feet of wall space, no floor space
- Best for: Small laundry rooms, apartments, tight closets
- Pros: Zero floor footprint. Easy to install. Bags unhook for transport to washer.
- Cons: Can look messy if bags are overfilled. Weight limit depends on wall anchoring.
I used this system in my kids’ bathroom. Two canvas bags hang from hooks behind the door. One for colors and one for whites. The kids drop their clothes in the right bag without thinking about it. For more small-space ideas, our small laundry room organization guide has plenty of solutions.
Option 3: Stacked Bin System
Individual bins stacked vertically in a rack or on shelves.
- Cost: $20 to $45 for bins plus rack
- Space needed: About 1.5x1.5 feet of floor space, uses vertical space
- Best for: Narrow spaces, laundry closets, utility rooms
- Pros: Minimal floor footprint. Bins slide out like drawers.
- Cons: Bottom bins are harder to access. Less intuitive for kids.
Option 4: Color-Coded Hampers
Individual hampers in different colors, one per category.
- Cost: $10 to $15 per hamper
- Space needed: Flexible placement
- Best for: Larger families, homes where laundry collects in multiple rooms
- Pros: Cheap, simple, and easy to understand. No confusion about which bin is which.
- Cons: Multiple hampers take up more total space.
Setting Up Your Sorting System: Step by Step
Here’s exactly how I set up our household sorting system in one afternoon.
Step 1: Choose Your Categories
For most families, I recommend starting with three:
- Darks: Black, navy, dark gray, dark-colored clothing
- Lights: White, cream, pastels, light-colored clothing
- Special care: Delicates, hand-wash items, heavily stained items that need pre-treatment
If you do a lot of towels and sheets, add a fourth category. But start with three and add complexity only if needed.
Step 2: Pick Your Location
Place sorting bins where clothes come off. For most families, that’s:
- Master bedroom or closet (adult clothes)
- Kids’ bathroom or bedroom (kids’ clothes)
- Laundry room (overflow and linens)
I made the mistake of putting our sorting system only in the laundry room at first. That meant carrying dirty clothes from the bedroom to the laundry room, then sorting them. Putting the sorter in the closet eliminated the carry step entirely.
Step 3: Label Clearly
Labels are essential, especially with kids. I use large, clear labels with both text and a color swatch:
- “DARKS” with a black square
- “LIGHTS” with a white square
- “DELICATES” with a pink square
My 7-year-old reads the labels. My 4-year-old uses the color swatches. Both systems work.
Step 4: Teach the Family
This is the step that makes or breaks the system. I spent 5 minutes with each family member showing them the bins and explaining the categories. I also put a small cheat sheet on the wall above the bins:
Dark bin: Jeans, black shirts, dark socks, dark towels Light bin: White t-shirts, khakis, light socks, light towels Delicate bin: Anything with lace, silk, or “hand wash” on the tag
It took about one week of gentle reminders before everyone sorted automatically. Now it’s just how we do things.
Does Sorting Laundry Really Matter?
Yes. Sorting prevents color bleeding, extends garment life, and ensures proper wash settings. Washing darks with lights can transfer dye, turning white shirts gray or pink over time. The American Cleaning Institute recommends sorting by color, fabric weight, and soil level for optimal cleaning results. Cold-water washing has reduced the color-bleeding risk somewhat, but sorting still matters for fabric care, stain treatment, and proper drying temperatures.
I learned this the hard way when a red sock turned an entire load of my husband’s white undershirts pink. He was a good sport about it, but that was the last time I skipped sorting.
Advanced Sorting Tips
Once your basic system is running smoothly, these refinements save even more time.
Pre-Treat Stains at the Hamper
I keep a stain treatment pen attached to the sorting hamper with a Velcro strip. When I notice a stain on a garment, I pre-treat it before tossing it in the bin. By wash day, the stain treatment has had hours (or days) to work. Our stain removal guide has a full breakdown of treatments by stain type.
Inside-Out Protocol
Darks, printed tees, and jeans last longer when washed inside out. I flip these as I sort them into the dark bin. This takes 2 seconds per garment and noticeably extends the life of printed designs and dark-dyed fabrics.
Zip and Button Before Sorting
Open zippers snag other clothes. Unbuttoned button-downs twist and wrinkle. I close zippers and buttons as I sort. This small habit reduced my folding time because fewer items come out of the dryer tangled or misshapen.
The “Full Bin = Full Load” Rule
I sized my bins so that a full bin equals one washer load. This means I never overfill the washer, and I never run a half-empty load. According to the Department of Energy, running full loads instead of partial loads saves about 3,400 gallons of water per year for the average household. It’s better for your clothes and your utility bill.
Sorting Systems for Different Family Sizes
Couple (2 People)
- Bins needed: 2 (darks and lights)
- Loads per week: 3 to 4
- Best system: Single two-section hamper in the closet
Family of 3 to 4
- Bins needed: 3 (darks, lights, delicates)
- Loads per week: 5 to 8
- Best system: Three-section hamper in the closet plus a two-bag wall setup in the kids’ area
Family of 5+
- Bins needed: 3 to 4 per zone
- Loads per week: 8 to 12
- Best system: Multiple hampers with a scheduled laundry day plan. See our family laundry schedule guide for a week-by-week system.
What I Wish I Knew About Laundry Sorting
-
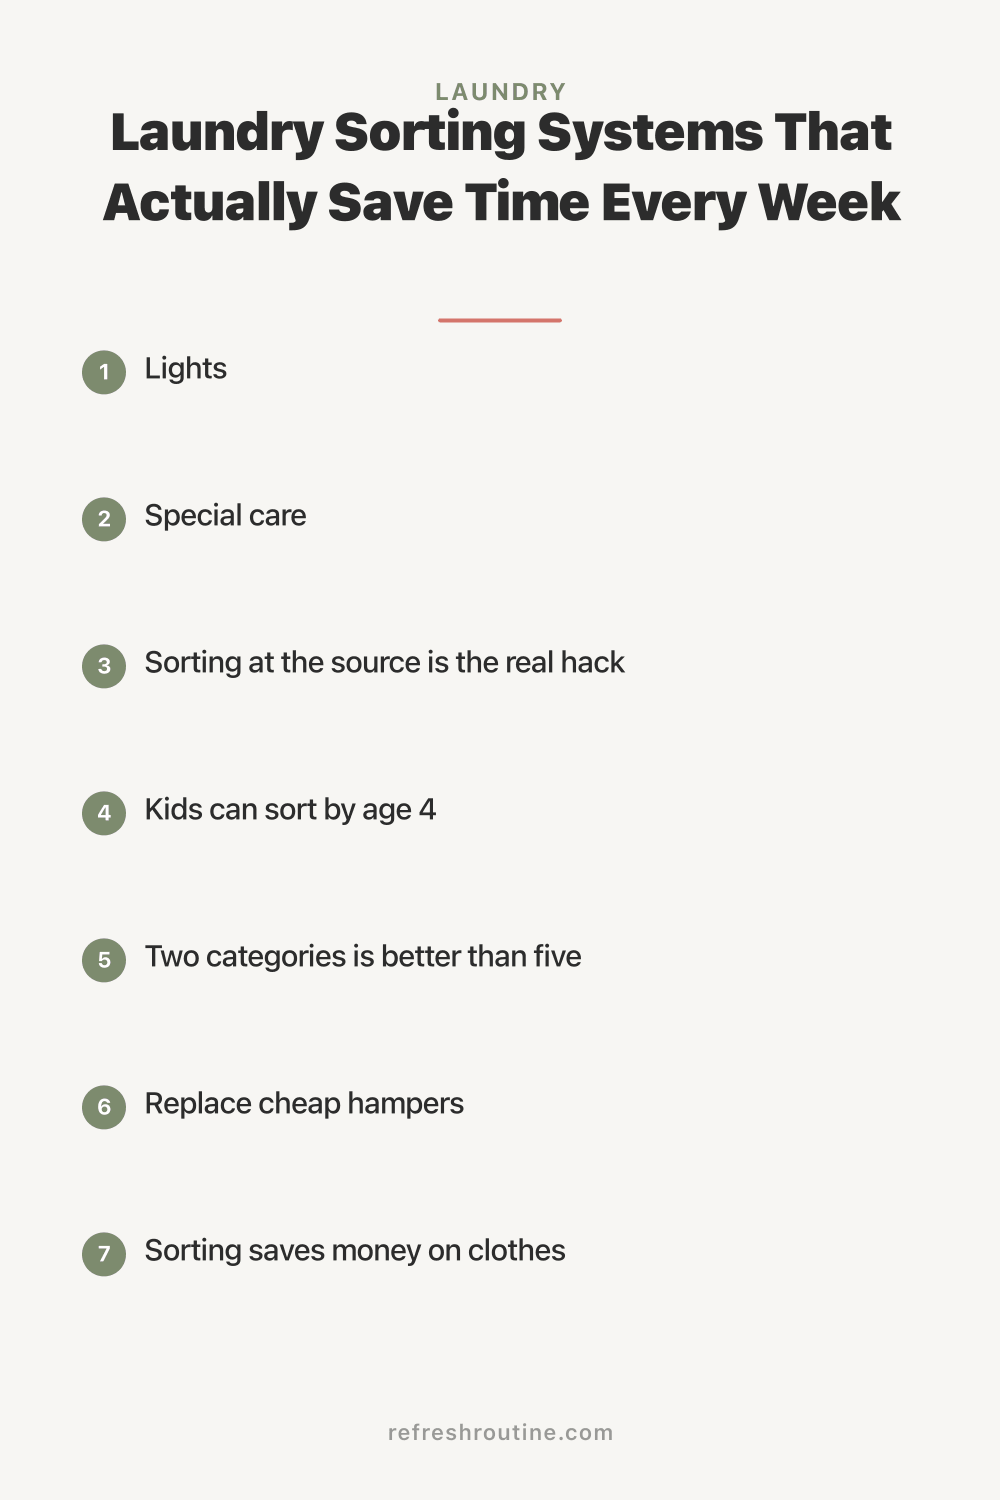
Sorting at the source is the real hack. I spent months sorting in the laundry room before realizing that moving the bins to the closet eliminated the entire sorting step on laundry day.
-
Kids can sort by age 4. I underestimated my youngest. With color-coded bins and simple labels, even preschoolers can put clothes in the right spot. It’s not perfect, but it’s close enough.
-
Two categories is better than five. When I tried to sort into too many categories (darks, lights, reds, delicates, towels), the system fell apart. Everyone got confused, and clothes ended up in random bins. Three categories is the sweet spot.
-
Replace cheap hampers. My first sorting hamper cost $15 and broke in three months. The fabric ripped, the frame bent, and the bags wouldn’t stay in place. I spent $45 on a sturdier model and it’s lasted two years so far.
-
Sorting saves money on clothes. Since implementing proper sorting, my family’s clothes last noticeably longer. Fewer faded darks, no more accidental dye transfers, and delicates that actually stay delicate.
Key Takeaway
A laundry sorting system works by moving the sorting step from laundry day to the moment clothes come off. Two to three labeled bins placed where clothes are generated eliminate the pre-wash sorting ritual entirely. For most families, a three-category system (darks, lights, delicates) is the right balance of simplicity and fabric care. The setup takes one afternoon, and the time savings add up every single week.
Build a Complete Laundry Routine
Sorting is one piece of a smooth laundry routine. Visit our laundry hub for all of our guides. Set up a family laundry schedule to spread the workload across the week, and grab our stain removal cheat sheet for quick reference. If your laundry room needs a physical makeover too, our small laundry room ideas will help you maximize the space.

Frequently Asked Questions
How many laundry sorting bins do I need?
Most families need two to three sorting bins. A basic system separates darks, lights, and delicates. Families of four or more may benefit from adding a fourth bin for towels and linens. More than four bins is usually unnecessary and takes up too much space for the time saved.
Should you sort laundry before or after washing?
Sort laundry before washing for best results. Pre-sorting prevents color bleeding, ensures proper water temperature settings, and reduces fabric damage. Sorting at the hamper level (as clothes are generated) saves even more time compared to sorting a full pile on laundry day.
What is the fastest way to sort laundry?
The fastest method is sorting at the source. Place a two or three-bin hamper in the closet or bedroom where dirty clothes are generated. Family members sort as they undress, eliminating the sorting step on laundry day entirely. This method saves 10 to 15 minutes per week for an average family.