Tupperware Organization: How to Tame the Container Cabinet
The Tupperware cabinet in our kitchen was a war zone. Every time I opened the door, plastic containers and lids cascaded out. To find a matching lid, I emptied the entire cabinet onto the counter. Once a year I would purge and reorganize. Within 2 months, it was back to chaos.
The fix involved both decluttering and a smarter storage system. Here is the complete approach that has kept our containers organized for 3 years.
Why Tupperware Cabinets Become Chaos
Tupperware fails for predictable reasons:
- Mismatched lids: Lids and bases get separated
- Too many sizes: Variety becomes unmanageable
- Stacking causes slides: One slip = avalanche
- Mixed materials: Glass, plastic, silicone don’t mix
- Acquired from many sources: Buy, take from work, inherit
According to a survey by Real Simple, 73% of home cooks rank the Tupperware cabinet as their most disorganized kitchen area. The fix is structural, not just tidying.
What Is the Best Tupperware Organization System?
The best Tupperware organization system combines aggressive decluttering (match every lid, toss orphans, keep only sizes you use), separated storage (lids in vertical organizer, bases nested), and limited variety (2 to 3 container sizes maximum). The system prevents the avalanche and keeps containers findable for years.
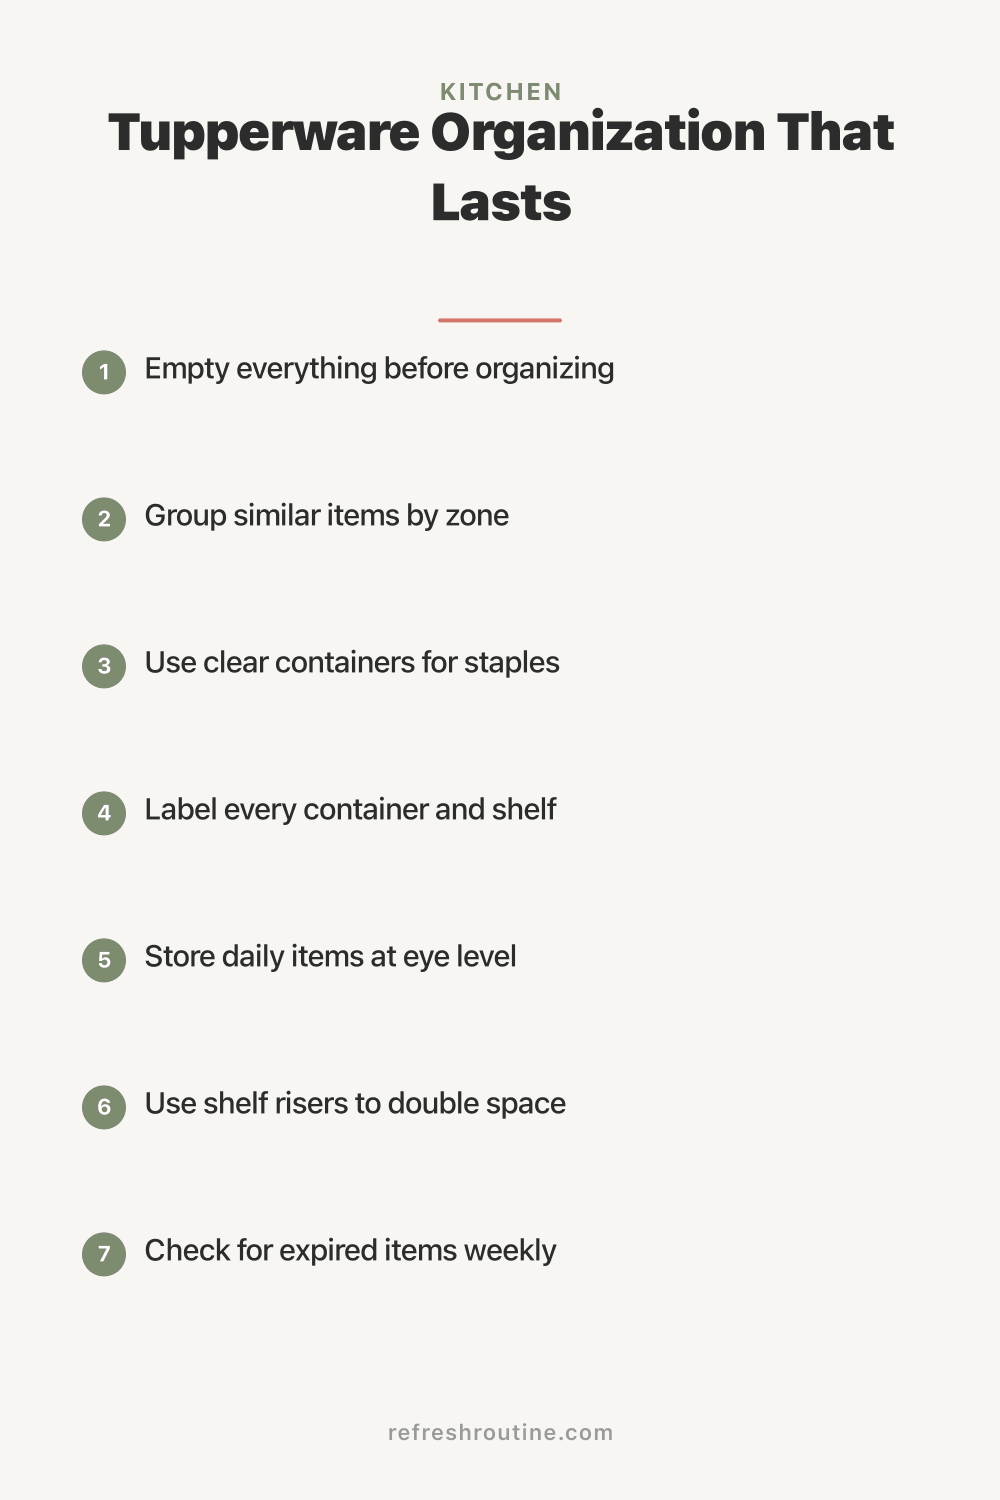
The Complete Tupperware Reset
Step 1: Empty the Cabinet (10 min)
Pull every container, lid, bowl, and miscellaneous item from the cabinet. Pile on counter or floor.
Step 2: Match Every Lid (30 min)
Go through systematically:
- Pair each container with its lid
- Set aside orphans (lids without bases, bases without lids)
Step 3: Decision Time (15 min)
Toss orphans: Lids without containers, containers without lids. The lid is not coming back; let it go.
Toss damaged: Cracked, stained beyond use, stretched-out
Toss old plastic: Anything yellowed, scratched, with no recall info (plastic degrades over time)
Donate: Items in good condition you do not use
Keep: Matched sets you actually use
Step 4: Audit Inventory (10 min)
How many of each size do you have? Most kitchens find:
- 4 to 6 small containers (snacks, single servings)
- 4 to 6 medium containers (leftovers, lunches)
- 2 to 4 large containers (batch cooking, big leftovers)
- 1 to 2 oversized (parties, family meal)
If you have more, reduce. Most are unused.
Step 5: Choose Storage Method
Several options:
Vertical lid file + nested bases: Lids stand in a vertical organizer; bases nest by size
Side-by-side with lids on: Containers with lids attached stay matched
Drawer organizer: Containers laid flat in shallow drawer
Choose what fits your cabinet space.
Step 6: Implement Storage
Install organizers. Place containers. Test by closing and opening the cabinet several times.
Step 7: Maintain
Weekly: Quick check that nothing has migrated to chaos Monthly: Reorganize if needed Quarterly: Audit and toss anything broken
What I Wish I Knew About Tupperware
After 3 years of refining this system, here is what helped most.
Less is more. I had 40+ containers. Use 15. Donated 25. The cabinet is 10x easier.
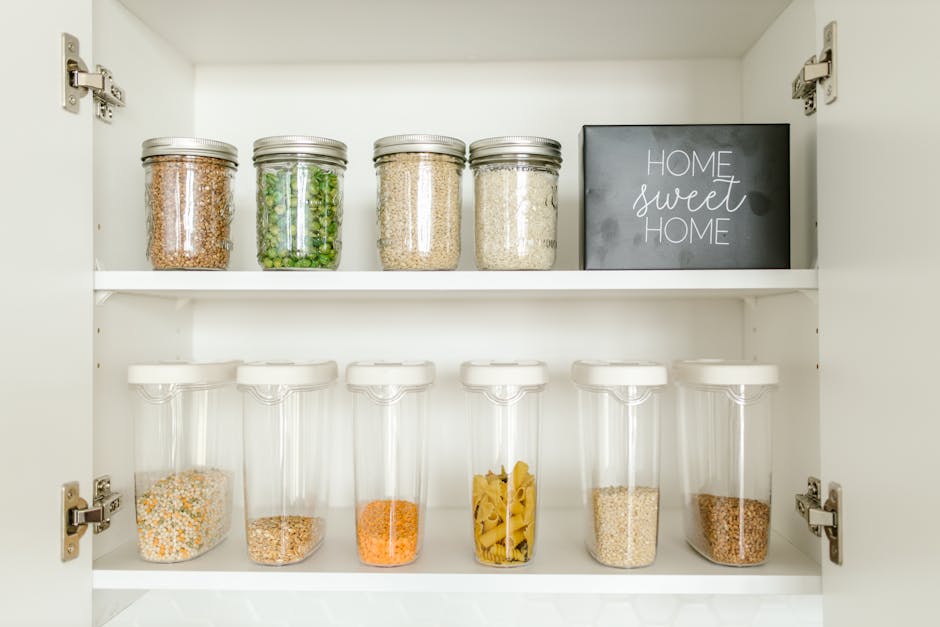
Glass is the best long-term investment. Bought matching glass set for $80. Three years later, all still functional. Original plastic was stained and warped within 6 months.
Vertical lid storage is the secret. Loose lids cause 80% of cabinet chaos. Vertical filing solves it.
Match the variety to actual use. I have 3 sizes only. Originally had 8. The 5 I dropped were never missed.
Sticker labels on container bottoms. Label sets so you can find matching sizes quickly.
Storage Methods Compared
Method 1: Vertical Lid File + Nested Bases
Setup: Stand lids vertically (like books) in a small file organizer. Stack bases by size, nested.
Pros: Most space-efficient. Lids are easily searchable.
Cons: Need separate file organizer ($10 to $20)
Best for: Most kitchens
Method 2: Lids On Containers
Setup: Each base stays paired with its lid (attached, not sealed). Stack vertically with lids on.
Pros: Always matched. No hunting for lids.
Cons: Takes more space. Containers stack less efficiently.
Best for: Tight cabinets where space is shared with frequent retrieval
Method 3: Drawer Storage
Setup: Lay containers flat in a drawer with dividers. Lids in a separate section.
Pros: Easy visibility. Open drawer = see everything.
Cons: Requires shallow drawer space.
Best for: Kitchens with deep drawers
Method 4: Pull-Out Drawer Organizer
Setup: A pull-out drawer specifically designed for Tupperware.
Pros: Clean and organized look. Easy access.
Cons: Expensive ($75 to $150). Requires installation.
Best for: Kitchens being renovated
How Many Containers Should You Keep?
Most kitchens function well with 12 to 20 containers total. Heavy meal preppers may use 25 to 30. Beyond that, you have duplicates of sizes you do not use, which becomes clutter. Audit by asking: “When did I last use this specific container?” If you cannot remember, donate.
Container Materials Compared
Glass
Pros: Microwave safe without leaching, stain-resistant, durable (5+ years), dishwasher safe, attractive
Cons: Heavier, breakable, more expensive
Best for: Most home use; ideal for leftovers and reheating
Plastic (BPA-free)
Pros: Lightweight, unbreakable, less expensive
Cons: Stains and absorbs odors, degrades within 1 to 2 years, less microwave-safe
Best for: Travel, kids’ lunches, rough use
Silicone
Pros: Flexible, collapsible, dishwasher safe
Cons: Less rigid, can hold odors
Best for: Space-saving (collapsible), specific uses like portioned baking
Stainless Steel
Pros: Indestructible, no leaching, easy clean
Cons: Not microwave safe, expensive
Best for: Long-term storage, eco-conscious users
Recommended Tupperware Setup
For most kitchens, a starter set:
Small Containers (4-6)
- 2 cup glass (snacks, kids portions, single servings)
- 4 to 6 quantity
Medium Containers (4-6)
- 4 cup glass (leftovers, lunches, sides)
- 4 to 6 quantity
Large Containers (2-4)
- 8 cup glass (batch cooking, family servings, fridge sides)
- 2 to 4 quantity
Plus 1 to 2 oversized for parties or big batches.
Total: 12 to 18 containers. Cost: $50 to $120 for full set.
Tupperware for Meal Prep
For active meal preppers:
- Multiple sizes for portion control
- Stackable, identical brand for predictable storage
- Glass for reheating freshness
- Clear lids for content visibility
- Labels for date and contents
See our meal prep storage guide for the complete meal prep system.
Common Tupperware Mistakes
After helping family members:
Mistake 1: Keeping orphan lids. They wait for containers that will never return. Toss.
Mistake 2: Mixing brands. Different sizes don’t stack. Standardize one brand.
Mistake 3: Keeping stained plastic. Stains indicate degraded plastic. Toss.
Mistake 4: Too many sizes. 5+ sizes is chaos. Reduce to 2 to 3.
Mistake 5: Stacking without separation. Container plus lid attached prevents avalanche.
For more kitchen organization, see our kitchen cabinet organization and pantry organization guides.
Storage Cabinet Setup
The Tupperware cabinet works best with:
Lower cabinet: Less reaching for heavy glass Pull-out: Renovate to add if doing other renovations Designated only for Tupperware: Do not mix with bakeware Lined: Use shelf liner to reduce slipping Lit: Battery-operated motion light if cabinet is dark
Reducing Tupperware Stains
Stains on plastic are inevitable, but you can slow them:
- Wash immediately after use (do not let food sit)
- Avoid acidic foods in plastic (tomato sauce stains worst)
- Use baking soda paste for fresh stains
- Soak in vinegar for 30 minutes for set stains
- For permanent stains, the plastic is degraded; donate or toss
When to Replace Plastic Containers
Plastic deteriorates over time. Replace when:
- Stained beyond use
- Warped or cracked
- Cloudy or yellowed
- Cannot pass dishwasher safely
- Smells of food regardless of washing
- Over 2 years of regular use
Glass alternatives last much longer.
Family Container Strategy
For families:
Kid’s containers: Separate set of smaller, plastic (safer) Adult’s lunches: Higher-quality glass set Shared family meals: Larger containers Special purposes: Dedicated containers for specific uses
Avoid mixing sets. Each “system” has its own storage location.
Travel Container Sets
For lunch packing:
- Bento-style with multiple compartments
- Insulated for hot/cold preservation
- Smaller than fridge containers
- Backpack/bag friendly
These often warrant their own cabinet or drawer location, separate from fridge containers.
Key Takeaway
Tupperware organization is more about decluttering than storage tricks. Match every lid, toss orphans, eliminate damaged or stained containers, and reduce to 2 to 3 sizes you actually use. Most kitchens function well with 12 to 20 total containers. Use vertical lid storage (file organizer) and nested base storage to maximize cabinet space. Transition to glass over time for longer-lasting, better-performing containers. Total reset takes 60 to 90 minutes. The result: a cabinet that opens without avalanche, lids that match bases, and the simple pleasure of finding the right container in 10 seconds instead of 5 minutes.
For more kitchen systems, see our kitchen cabinet organization and meal prep storage guides.

Frequently Asked Questions
How do you organize Tupperware containers?
Organize Tupperware by matching every lid to a container (toss orphans), nesting containers without lids (save space), storing lids vertically in a file organizer or rack (easy access), and keeping only the sizes you actually use. Most kitchens function with 8 to 15 containers of various sizes.
How many food storage containers does one household need?
A typical household functions well with 12 to 20 food storage containers in 2 to 3 sizes (small for snacks, medium for leftovers, large for batch cooking). Heavy meal preppers may want more. Most people own 2 to 3x more containers than needed. Reduce to fit actual usage patterns.
Should you keep glass or plastic Tupperware?
Glass containers are superior in nearly every way: microwave safe without leaching, stain-resistant, longer-lasting (5+ years vs 1 to 2), more aesthetic, and reheat better. The downside is weight and breakability. Plastic is better only for travel or rough use. Most homes should transition to glass over time.