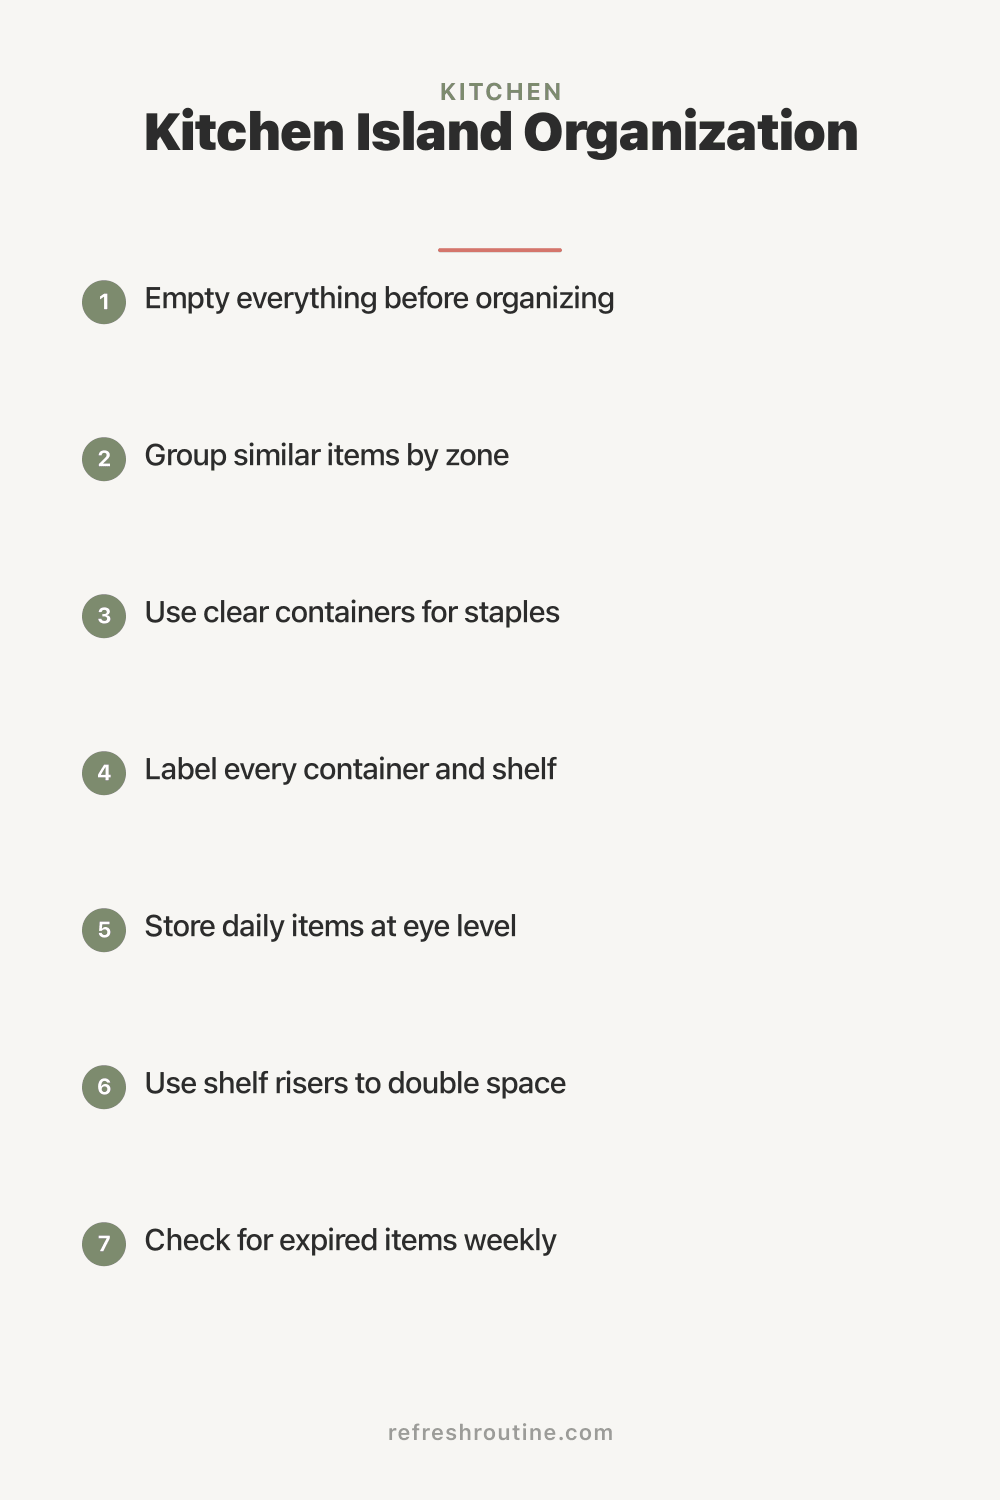
Kitchen Island Organization: Maximize Every Inch
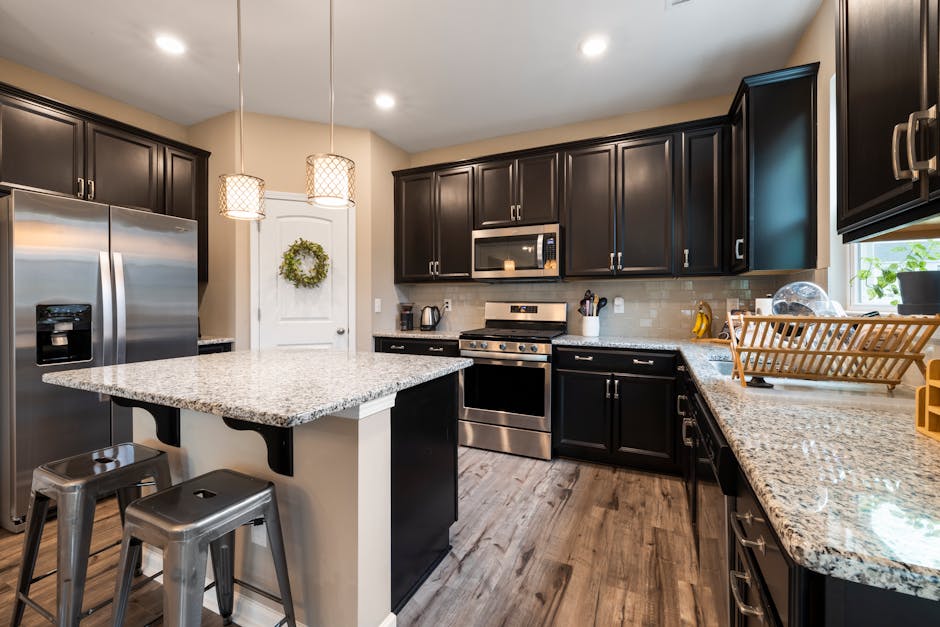
Our 7-foot kitchen island provided extra storage that I initially used for everything random: backup dishes, kid art supplies, take-out menus, things without homes. Within 6 months, the drawer organization had completely failed.
The fix was zone-based organization. Now the island has specific purposes for each section. Cooking is faster, finding things is easier. Here are the 10 organization ideas that finally tamed our island.
Why Kitchen Island Organization Matters
A kitchen island is prime kitchen real estate. Disorganized:
- Wasted opportunity: Best storage location wasted
- Workflow disruption: Items in wrong spots
- Catch-all clutter: Becomes random storage zone
- Reduced function: Island becomes less useful than expected
According to research from HGTV, kitchen islands are the most-used cabinet area in modern kitchens. Proper organization maximizes function dramatically.
What Is the Best Kitchen Island Organization?
The best kitchen island organization uses zones based on the island’s purpose: prep zone (cutting boards, knives, spices), cooking zone (pots, pans, utensils), serving zone (plates, glasses, serving pieces), and storage zone (bulk items, less-used pieces). Match storage to the function the island supports.
10 Kitchen Island Organization Ideas
1. Zone by Activity
Divide the island into functional zones based on what you do there.
Cost: Free planning Best for: All islands
2. Drawer Dividers
Use drawer organizers for utensils, knives, baking tools.
Cost: $15 to $50 per drawer Best for: All islands with drawers
3. Pull-Out Trash and Recycling
Built-in or freestanding pull-out garbage and recycling.
Cost: $80 to $200 Best for: Islands without dedicated trash storage
4. Cookbook Shelf or Holder
Built-in shelf at island for cookbooks. Recipe at eye level.
Cost: $20 to $40 Best for: Active cooks
5. Lazy Susan in Corner
Turntable in corner cabinet of island.
Cost: $20 to $40 Best for: Hard-to-reach corner spaces
6. Vertical Pull-Out for Tray Storage
Tall narrow drawer for trays, cutting boards, sheet pans.
Cost: $40 to $80 Best for: Custom or pull-out islands
7. Drink Station
Designated section for coffee maker, kettle, or beverage center.
Cost: Existing setup, organization free Best for: Morning routine focus
8. Wine Storage
Built-in or insertable wine racks.
Cost: $40 to $200 Best for: Wine enthusiasts
9. Charging Station
Designated outlet area for phones, tablets, charging needs.
Cost: $20 to $50 Best for: Modern islands
10. Built-In Hooks
Hooks under island for hand towels, oven mitts, aprons.
Cost: $10 to $25 Best for: All islands
What I Wish I Knew About Island Organization
After 5 years of refining ours, here is what helped most.
Zones are everything. Without zones, the island becomes chaos. With zones, function is clear.
Drawers need organizers immediately. Loose items in drawers = lost items. Organizers = found in 5 seconds.
Plan around the activity. Our island is prep-focused. Knives, cutting boards, mixing bowls all near. The work flows.
Trash storage is essential. Built-in trash makes the island twice as functional.
Reduce items aggressively. Items in island should be daily-use only. Backup or rare items go to other cabinets.
How Do You Plan Kitchen Island Organization?
Plan kitchen island organization by identifying the primary activity supported (prep, baking, serving, eating), then storing items needed for that activity within reach. Use drawers for utensils and tools, cabinets for pots and large items, vertical storage for trays and boards, and dedicated zones for trash and recycling. Plan storage to match cooking workflow.
Setting Up Zones
Prep Zone
Storage:
- Knives (knife block or drawer)
- Cutting boards (vertical storage)
- Mixing bowls (stackable)
- Measuring cups and spoons
- Spice rack or jar storage
- Hand towel hook
Tools at prep zone are within arm’s reach during chopping and assembly.
Cooking Zone
Storage:
- Pots and pans (deep drawers)
- Cooking utensils (drawer)
- Oils and frequently used spices (cabinet)
- Pot holders
- Aluminum foil and parchment
Cooking items are between stove and prep zone.
Baking Zone
Storage:
- Stand mixer (cabinet)
- Baking sheets and pans (vertical)
- Mixing bowls (drawer)
- Measuring cups
- Flour, sugar, baking soda (canisters)
- Rolling pin
Baking items grouped for full project setup.
Serving Zone
Storage:
- Plates and bowls (cabinet)
- Glassware
- Silverware
- Serving platters
- Napkins or tablecloths
- Wine glasses
Items needed for table setting.
Storage Zone
Storage:
- Backup dishes
- Less-used appliances
- Bulk supplies
- Specialty cookware
- Seasonal items
Items used weekly to monthly.
Specific Drawer Organization
Top Drawer (Smallest Items)
- Silverware
- Cooking utensils
- Small tools (peelers, etc.)
- Measuring spoons
Middle Drawer (Tools)
- Larger cooking utensils
- Measuring cups
- Whisks
- Tongs
Bottom Drawer (Pots and Pans)
- Pots and pans
- Lids organizer
- Frying pans
Specialty Drawer (Bakeware)
- Bakeware
- Sheet pans
- Mini muffin pans
- Specialty molds
For more on drawer organization, see our kitchen drawer organization guide.
Common Island Organization Mistakes
After helping family members:
Mistake 1: Random storage. Wastes potential.
Mistake 2: Mixing zones. Disrupts workflow.
Mistake 3: Storing rarely-used items. Wastes prime real estate.
Mistake 4: No drawer organization. Items lost.
Mistake 5: Catch-all junk drawer. Becomes chaos.
For more, see our kitchen cabinet organization and cabinet organization guides.
Optimizing Common Island Types
Galley Style Island
Long and narrow:
- Linear zones (prep on one end, cooking on other)
- Vertical storage along length
- Multiple drawer sections
L-Shape Island
Two perpendicular sides:
- Corner storage with lazy susan
- One zone per side
- Workflow follows the L
Floating Island
Standalone:
- Storage on multiple sides
- Trash and recycling accessible
- Multi-purpose zones
Eat-In Island
Includes seating:
- Storage focused on serving zone
- Plates and dishes nearby
- Family-friendly accessibility
Adding Storage to Existing Island
If island lacks storage:
Add Inside Cabinet:
- Lazy susan
- Pull-out drawers
- Shelf risers
Add Drawer Inserts:
- Organizers for any drawer
- Adjustable dividers
- Specialty inserts
Add Hooks and Bars:
- Inside cabinet doors
- Under counter
- Side panels
Add Open Shelf:
- Mounted to side
- Spacing for items
- Decorative possibilities
Family Island Considerations
For households:
Kid-friendly zones: Lower drawers for kids Snack drawer: Kids’ access Cookware education: Show kids the zones Family meals: Plan around island design
Specific Island Activities
Coffee Bar
Designate one end:
- Coffee maker
- Grinder
- Mugs
- Beans/grounds
- Cream/sugar
See our coffee station organization guide.
Beverage Center
Designate one section:
- Wine refrigerator
- Wine glasses
- Bottle opener
- Decanter
- Tray for service
Charging Hub
Designate one section:
- USB outlet
- Charging cables
- Phone tray
- Tablet holder
- Cord management
Maintenance Routine
Keep island functional:
Daily: Surface reset after use Weekly: Drawer check, return items Monthly: Inventory check, declutter incoming items Quarterly: Major review, adjust if needed
Investment Considerations
Island upgrades:
Basic ($50 to $150):
- Drawer dividers
- Lazy susan
- Hooks
Mid-range ($150 to $500):
- Pull-out trash
- Cable management
- Vertical pull-out
Premium ($500 to $2,000+):
- Custom drawer system
- Built-in wine storage
- Custom shelving
- Charging station
Key Takeaway
Kitchen island organization works best with zone-based planning matched to the island’s primary purpose (prep, cooking, baking, serving). Each zone holds items specifically needed for that activity. Use drawer organizers for utensils and tools. Plan around your cooking workflow. Most islands provide 15 to 40 cubic feet of storage; intentional planning maximizes function. Total investment in organization: $50 to $500 for most islands. The setup takes one Saturday afternoon. The benefit: smoother cooking workflow, faster meal preparation, and an island that supports rather than collects daily kitchen life.
For more kitchen organization, see our kitchen cabinet organization, pantry organization, and kitchen drawer organization guides.

Frequently Asked Questions
How do you organize a kitchen island?
Organize a kitchen island by zone: prep zone with cutting boards and knives, baking zone with mixers and baking sheets, serving zone with serving pieces, and storage zone with bulk items. Use drawer organizers for utensils, larger drawers for pots and pans, and shelves for everyday dishes.
What should be stored in a kitchen island?
Store items you use daily and items used for the activity the island supports. For prep islands: knives, cutting boards, spices. For baking islands: mixers, baking sheets, bowls. For serving islands: serving pieces, plates. Avoid mixing zones to maintain functional organization.
How much storage does a kitchen island provide?
A typical 4-foot kitchen island provides 15 to 25 cubic feet of storage. A 6-foot island offers 25 to 40 cubic feet. The amount equals 8 to 15 typical cabinet spaces. Islands work best when storage is planned for specific activities rather than catch-all storage.